A couple of years ago, a friend from the Ocean County Home Brewers Association introduced me to the concept of Brew in a Bag (BIAB). The idea of using one vessel (the brew kettle) for the entire operation intrigued me. I am a traditionalist at heart, so I had some reservations about BIAB. However, once I became comfortable with the process I found it saved time in my brew day, made cleanup easier, and it did not sacrifice beer quality.
The traditional all grain home brew process consists of several vessels and pieces of equipment to make your brew day complete. You have the mill to crush open the hulls of your grain and add to your mash tun, so you can add your strike water from your hot liquor tank (HLT) and begin your mash. If the grind is too coarse, it will affect the conversion of your malt, because not enough sugars will be released and you will have a weak beer. Too fine and among other things you risk a stuck sparge. A stuck sparge is a rite of passage for home brewers and sometimes for professional brewers – everyone should experience it. This is the basic process behind all grain brewing which I have been doing for about 5 years.
Mash in a Bag
I had just begun to master all grain brewing when I first started using BIAB, so I wondered how this new process would affect my beers. Would I hit my gravity numbers? Would I violate the Reinheitsgebot? Would my HLT and Mash Tun suffocate me in my sleep? I was willing to take a chance in the interest of progress. I’m from Jersey, so I can handle a couple of igloo coolers… and do I really care about some German beer purity rules from 600 years ago?
I am a cautious person, so I actually started with Mash in a Bag. I followed the same traditional process, but removed the false bottom on my mash tun and lined it with a mesh bag. I still sparged, etc., but this enabled me to lift the mesh bag to assist with the draining of the wort and also made it easier to clean the mash tun.
The comfort level of using mesh bags on my brew day was established and it was time to go all in on Brew in a Bag. BIAB uses one vessel, in my case, the 15 gallon brew kettle. You are actually combining your brew and sparge water, so you want to make sure your kettle is big enough to handle your batch size. You will be using a higher water/grain ratio than the traditional 1.5 quarter or so per pound of grain so you are going to need the room. There is a formula, if you like math, but I am a 21st century guy, so I use a site http://biabcalculator.com which tells me how much water to use.
I have a 15 gallon, SS Brewtech kettle that can handle up to a 10 gallon batch. Most recently I brewed an Imperial Stout with 24.5 lb grain bill and it almost topped out, but was able to handle it. It also holds the heat very well, so does a good job of maintaining the mash temperature. Whether you use BIAB or the traditional all grain method, you will always have a boil kettle. Let’s focus in on some of the differences when you BIAB.

Brew in a Bag
I used a generic bag in my first one or 2 batches, but found they were prone to tears and rips. This caused grain to leak into the kettle, which defeats the purpose of brewing in the bag. The best reviews I found were for The Brew Bag. Before purchasing your bag make sure you have the right size for your kettle. I have a 20 gallon bag for my 15 gallon kettle, but customer service at the company is very responsive and you can always ask them.
I have brewed about 20 batches using this same bag and I have been ecstatic about the results. It is strong, durable and is very easy to clean. It has handles around the edges so you can tie bungee cords or ropes around it, making it easy to gather when you are pulling your bag out to drain and squeeze the wort out of your batch into the kettle.
The Grain
One mistake I made early in my BIAB initiation is when I milled the grain and left it too coarse. BIAB doesn’t require sparging, so you can mill the grain finer (some flour is ok) and it may help you extract more sugars which helps with your efficiency. Set your rollers at a finer setting or send it through 2 times if you are milling it yourself. If you are going to have your homebrew shop mill it for you let them know that it is for BIAB.

Mash In
Knowing your equipment is of extreme importance to a brewer. Water temperature will drop once you add the grist, so you need to know what strike temperature your hot water should be before you drop the grain into the bag. Usually it is about 8-10 degrees, so if your mash temperature is 150 degrees, the strike should be about 158-160 degrees. The quality of your equipment can also be a factor in determining your tempature. Once you have hit your number, cut the flame and arrange the bag around your kettle, overlapping it a few inches on the outside.
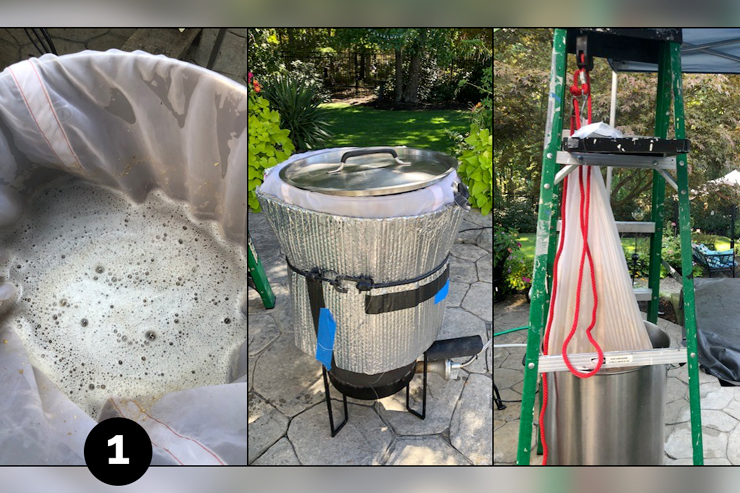
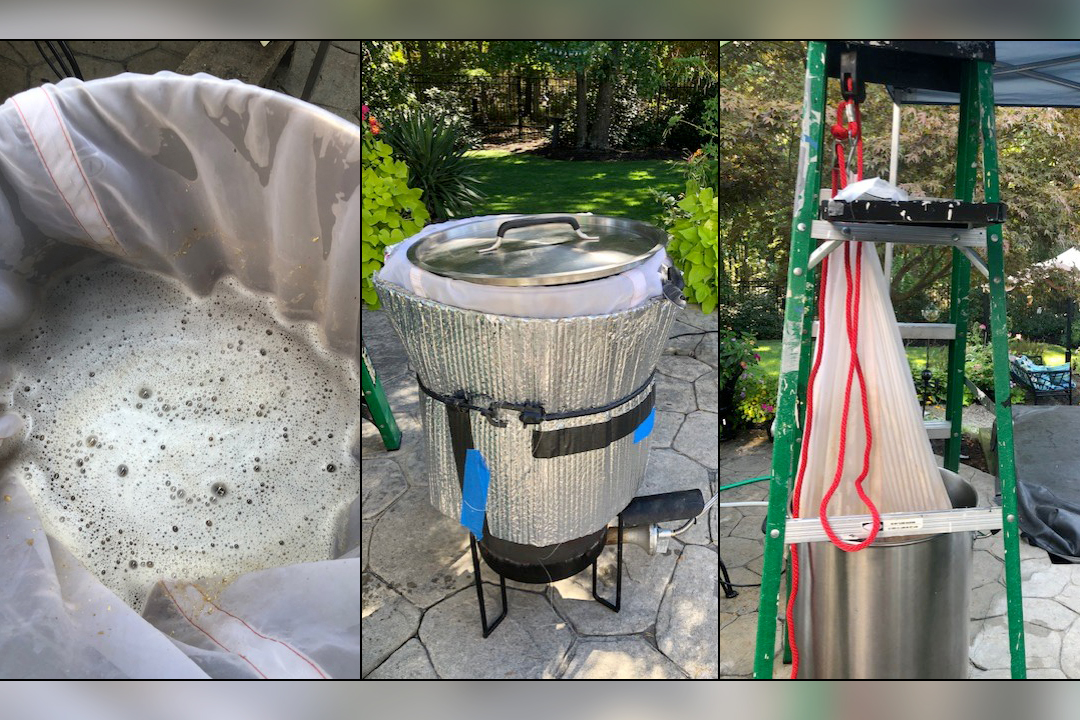
I secure my bag to the kettle with large paper clips – you don’t want to add your grain and have the bag collapse in the kettle. Once the grain is fully saturated and I have made sure there are no dough balls, etc., I remove the clips, put the lid on, and insulate the kettle. I use silver insulation and a bungee chord to secure the wrapping. I then set a timer for the mash time the recipe requires, have a beer, and chill.

Draining the Brew Bag
Now that your mash is done it is time to drain the wort out of The Brew Bag and into your kettle. This can be best accomplished with the help of a friend. You have to handle however many pounds your dry grain bill was, plus the water from your mash plus the fact that you want to drain as much liquid as possible from the bag. I usually brew outside and often by myself, so I invested in a pulley system, which are also available from The Brew Bag. I use the pulley, along with a utility ladder, gather the loops together, attach them to the hook on the pulley and pull. Twisting the bag while holding it aloft will compress more of the grain wort and then you can squeeze.
There are differing opinions and some brewers believe that bitter tannins are released when the bag is squeezed. I have tried both ways with the same beer and noticed no difference except less wort. If you go to the Brew Bag web site they will tell you squeeze away! I would recommend you invest in some long insulated rubber gloves so your hands don’t look like they are coming out of a lobster pot.
I will then dump the spent grain in a bucket for chicken feed, biscuits, or the compost pile and clean the bag. It is delicate fiber so I don’t put it in the washing machine – I just hose it off and let it air dry.
BIAB for the Boil
My Brew Bag is not fireproof, so I do not use it in my boil. You might be tempted to use it for hop additions, etc., just make sure the bag is raised off of the bottom of the kettle so it doesn’t scorch and develop holes. Using one in an electric brew kettle might be risky – you wouldn’t want the bag to sit on your heating element.
There may be times and brews that I need to go back to the traditional basics, but I’ve found Brew in a Bag to be real time and toil saver.


